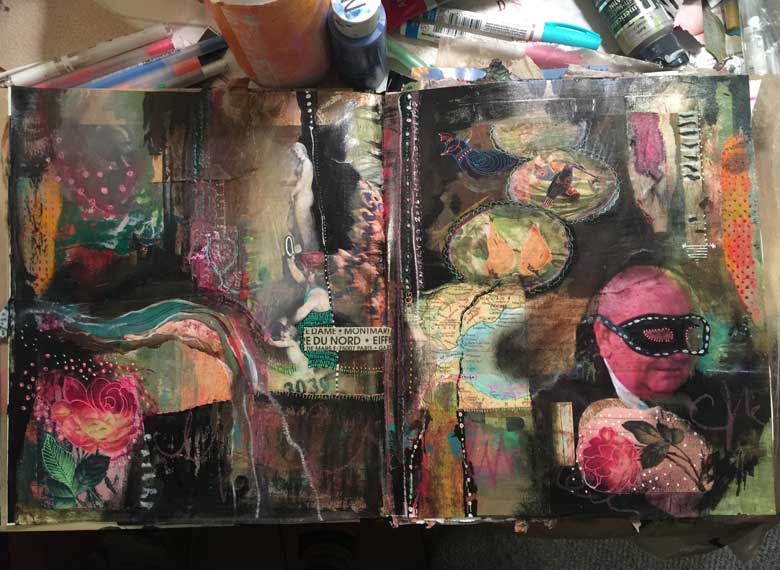
The journal spread above uses a set method. Although I don’t usually work this way, this is how this spread was done.
The slideshow above shows 4 of the 5 steps that are listed below (sometimes I forget to stop and take photos). I suppose the thing to notice is how unrelated things are to begin with… and slowly they come together.
Below are the steps you can take to create an artist book of your own!
Step 1.
Find an interesting spread in a used book, take 3-6 fairly large pieces of scrap/ephemera and glue into the book using gel medium or matte medium. Once in position, squeeze out air bubbles by using a credit card or Bondo tool. This will also remove the excess adhesive.
Step 2.
Add 2-3 blocks of color to tie things together. Use a muted palette. Color will come later. Keep it loose, and add different kinds of strokes and textures with your fingers, brushes and other mark making tools you might have.
Step 3. (This is the missing step from my photos)
Add several smaller pieces of ephemera with little pops of color or texture, and make sure they tie in somehow.
Step 4.
Apply black blobs, patterns and blocking (these areas will later be filled with gel pen textures and markings). You can also do the same with white after the black is done.
Step 5.
Varnish with matte liquid varnish and allow to dry completely. Then add all the finishing touches with gel pens, permanent markers and the like. And Voila! You’re on to the next spread!
Have fun! I’d love to see what you create…
Devon Rose Henderson liked this on Facebook.
Christy L. Miller liked this on Facebook.
Marcia Rose Harris liked this on Facebook.